A few notes for SLC Locals:
Books for November celebration cakes are now open! Thanksgiving pie and cake orders will open next week.
On November 3rd, I’m making dessert for an evening with Thank You For the Short Notice and the Blue Copper Chess Club at Notes, Nona’s new wine bar. We’ll be welcoming fall. Here’s a bit more info. It’ll be cozy and delicious.
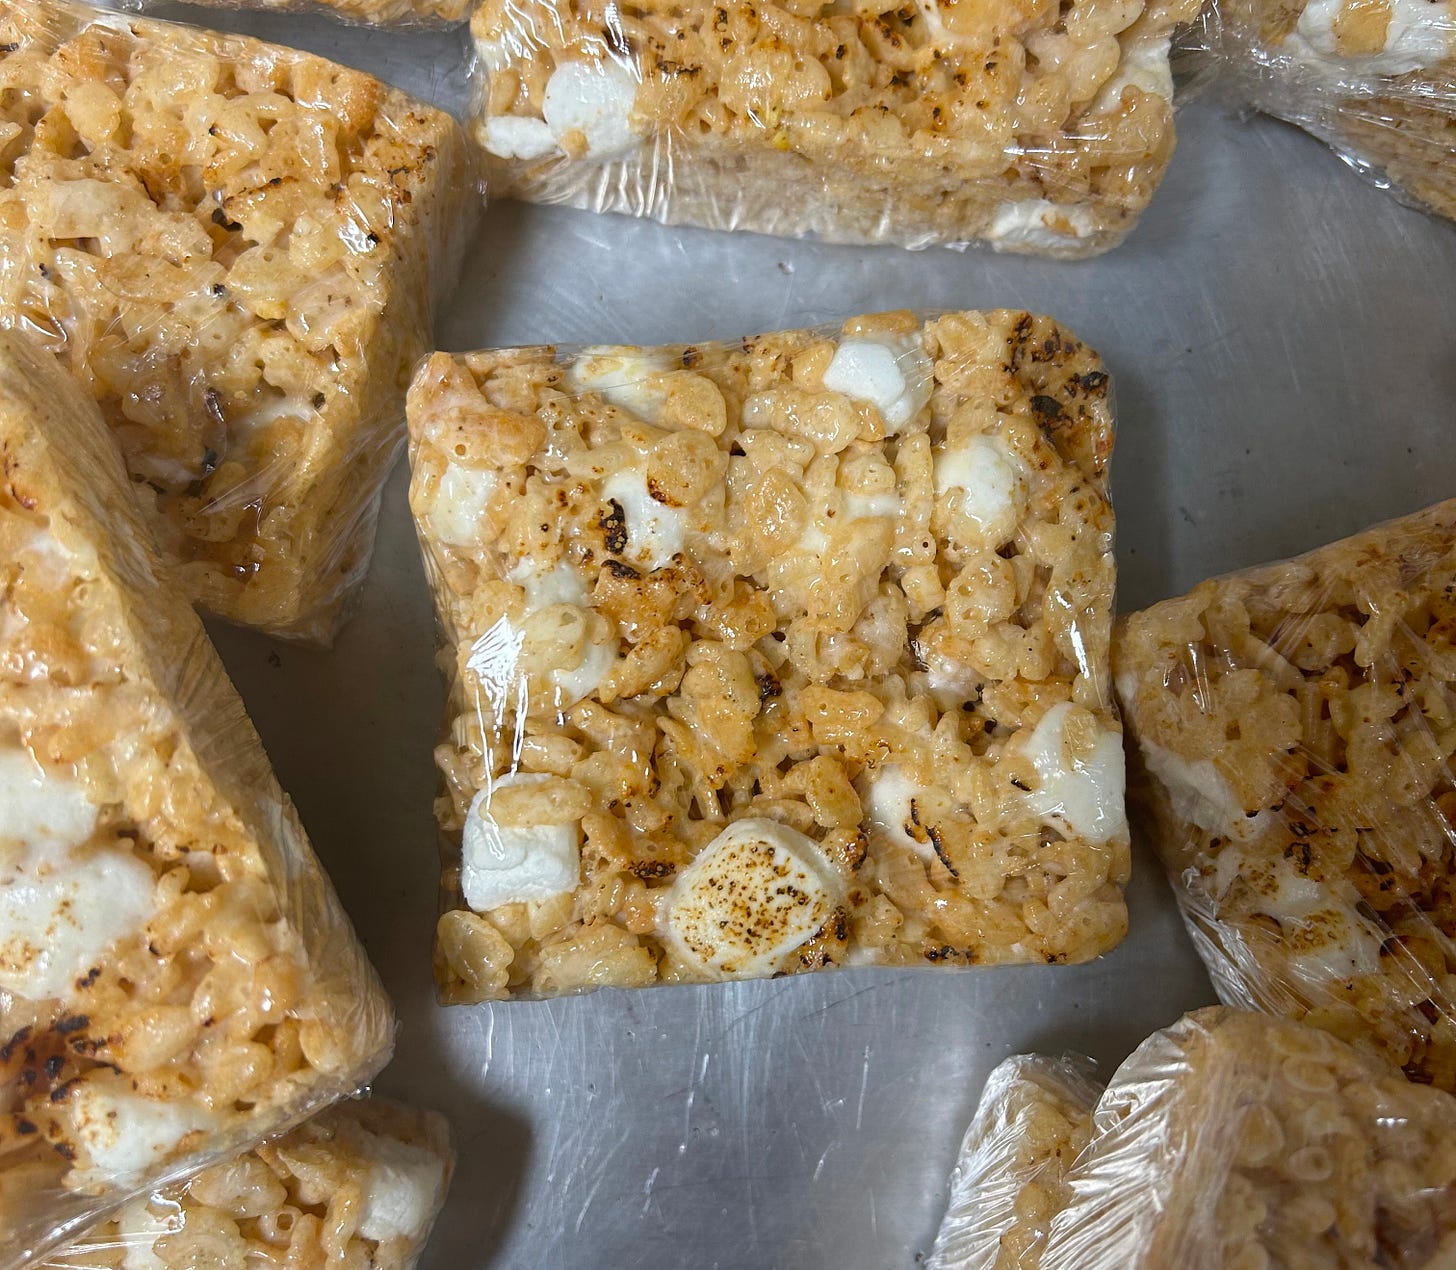
This rice krispie treat is a perfect exhibit of two guiding principles in my kitchen. The first, color equals flavor. The second, and these are not my words, they are the words of someone who I spend almost every day with, who expertly cooks in a way that embodies this principle: simple ain’t easy.
Color equals flavor. There are 3 ingredients in rice krispie treats and we’re adding heat to all of them. We’re toasting the cereal, we’re browning the butter, and we’re roasting the marshmallows. Essentially, we’re adding deeper flavor at every stage. None of these steps are essential to making a rice krispie treat, but they’ll add a complexity to something that would be otherwise, dare I say, a little flat. Which leads to…
Simple ain’t easy. When thinking about this puffed rice treat, I considered the many ways that I could make them more interesting: espresso powder in the melted marshmallow; pistachios and honey mixed in; dustings of cayenne and cocoa powder. When it came down to it, though, I was most inspired by what a rice krispie treat is - sticky crunchines, crunchy stickiness - and so I focused on making the confection the highest version of itself. None of the steps we’re taking are necessarily difficult, nor are they revolutionary, but they are more labor intensive than if we had chosen not to roast, toast, and brown.
The final product will feel simple, but when sharing them with your friends, you’ll know that a lot of work went into them. And when those friends eat these treats and say “WHOA, that is GOOD”, you’ll smile because you know that color equals flavor and simple ain’t easy.
That said, it’s not actually that much work. Most of the caramelizing is passive time. Plus, you don’t even need a blowtorch!
As with all recipes, you should read the whole thing through before making, but especially with this one. I want you to know where you’re headed because there’s at least one step (broiling your marshmallows) that can get a little tricky if done out of order.
With that, let’s make these Toasted-At-Every-Stage Rice Krispie Treats.
Ingredients:
Adapted from Deb Perelman’s recipe
½ cup (113g) unsalted butter
285g marshmallows (it’s a full 10oz bag)
½ teaspoon salt
½ teaspoon vanilla extract
160g rice krispie cereal (about half of a 12oz box)
50g (about 1 handful) mini marshmallows (optional)
You’ll need: An 8x8 or 9x9 pan, parchment paper, rubber spatula, large pot, plastic wrap or container for storage
Prepare your pans
Grease the sides of an 8x8 or 9x9 pan and line it with parchment paper. Cut the parchment big enough so that about 2 inches hang over the sides - this will make removing the treats from the pan easier.
Toast your rice krispies
Heat your oven to 300 degrees.
Line a baking sheet with parchment paper. Pour your cereal onto the pan and toast for 10 minutes, rotating the pan halfway through. They will be golden brown and smell a little bit like toast.
Remove from the oven and let them cool. Use the parchment paper to help you transfer the cereal to a medium bowl. Save the parchment for later, when we roast the marshmallows.Brown your butter
In a large pot (one that can eventually hold a bag of marshmallows), melt the butter over medium-low heat. As the butter melts, it will start to foam. Use a heat-resistant spatula to stir the butter occasionally, ensuring it cooks evenly and doesn't burn on the bottom. The butter will go through several stages during the browning process. After the foaming subsides, you'll notice milk solids forming on the bottom of the pan. This is where the flavor is. Keep stirring gently.
Observe the color because once the foam calms, the browning happens quickly. As the butter caramelizes, it will turn from a pale yellow to a deep golden. We’re looking for a dark golden brown. As soon as the butter reaches that color and releases the nutty scent, immediately remove the pan from the heat and set aside. Give the pot one more good scrape to release any milk solids from the bottom.
Broil your marshmallows (if you did not read the entire recipe before starting, at least read the next two sections before moving forward)
Position an oven rack a couple slots below the broiler. Turn on the broiler setting of your oven to high and let it preheat for 5 minutes.
On a parchment lined baking sheet, arrange ⅔ of the marshmallows towards the center of the sheet. You don’t want them too close to the edge because they’ll expand and we want them to stay on the parchment.
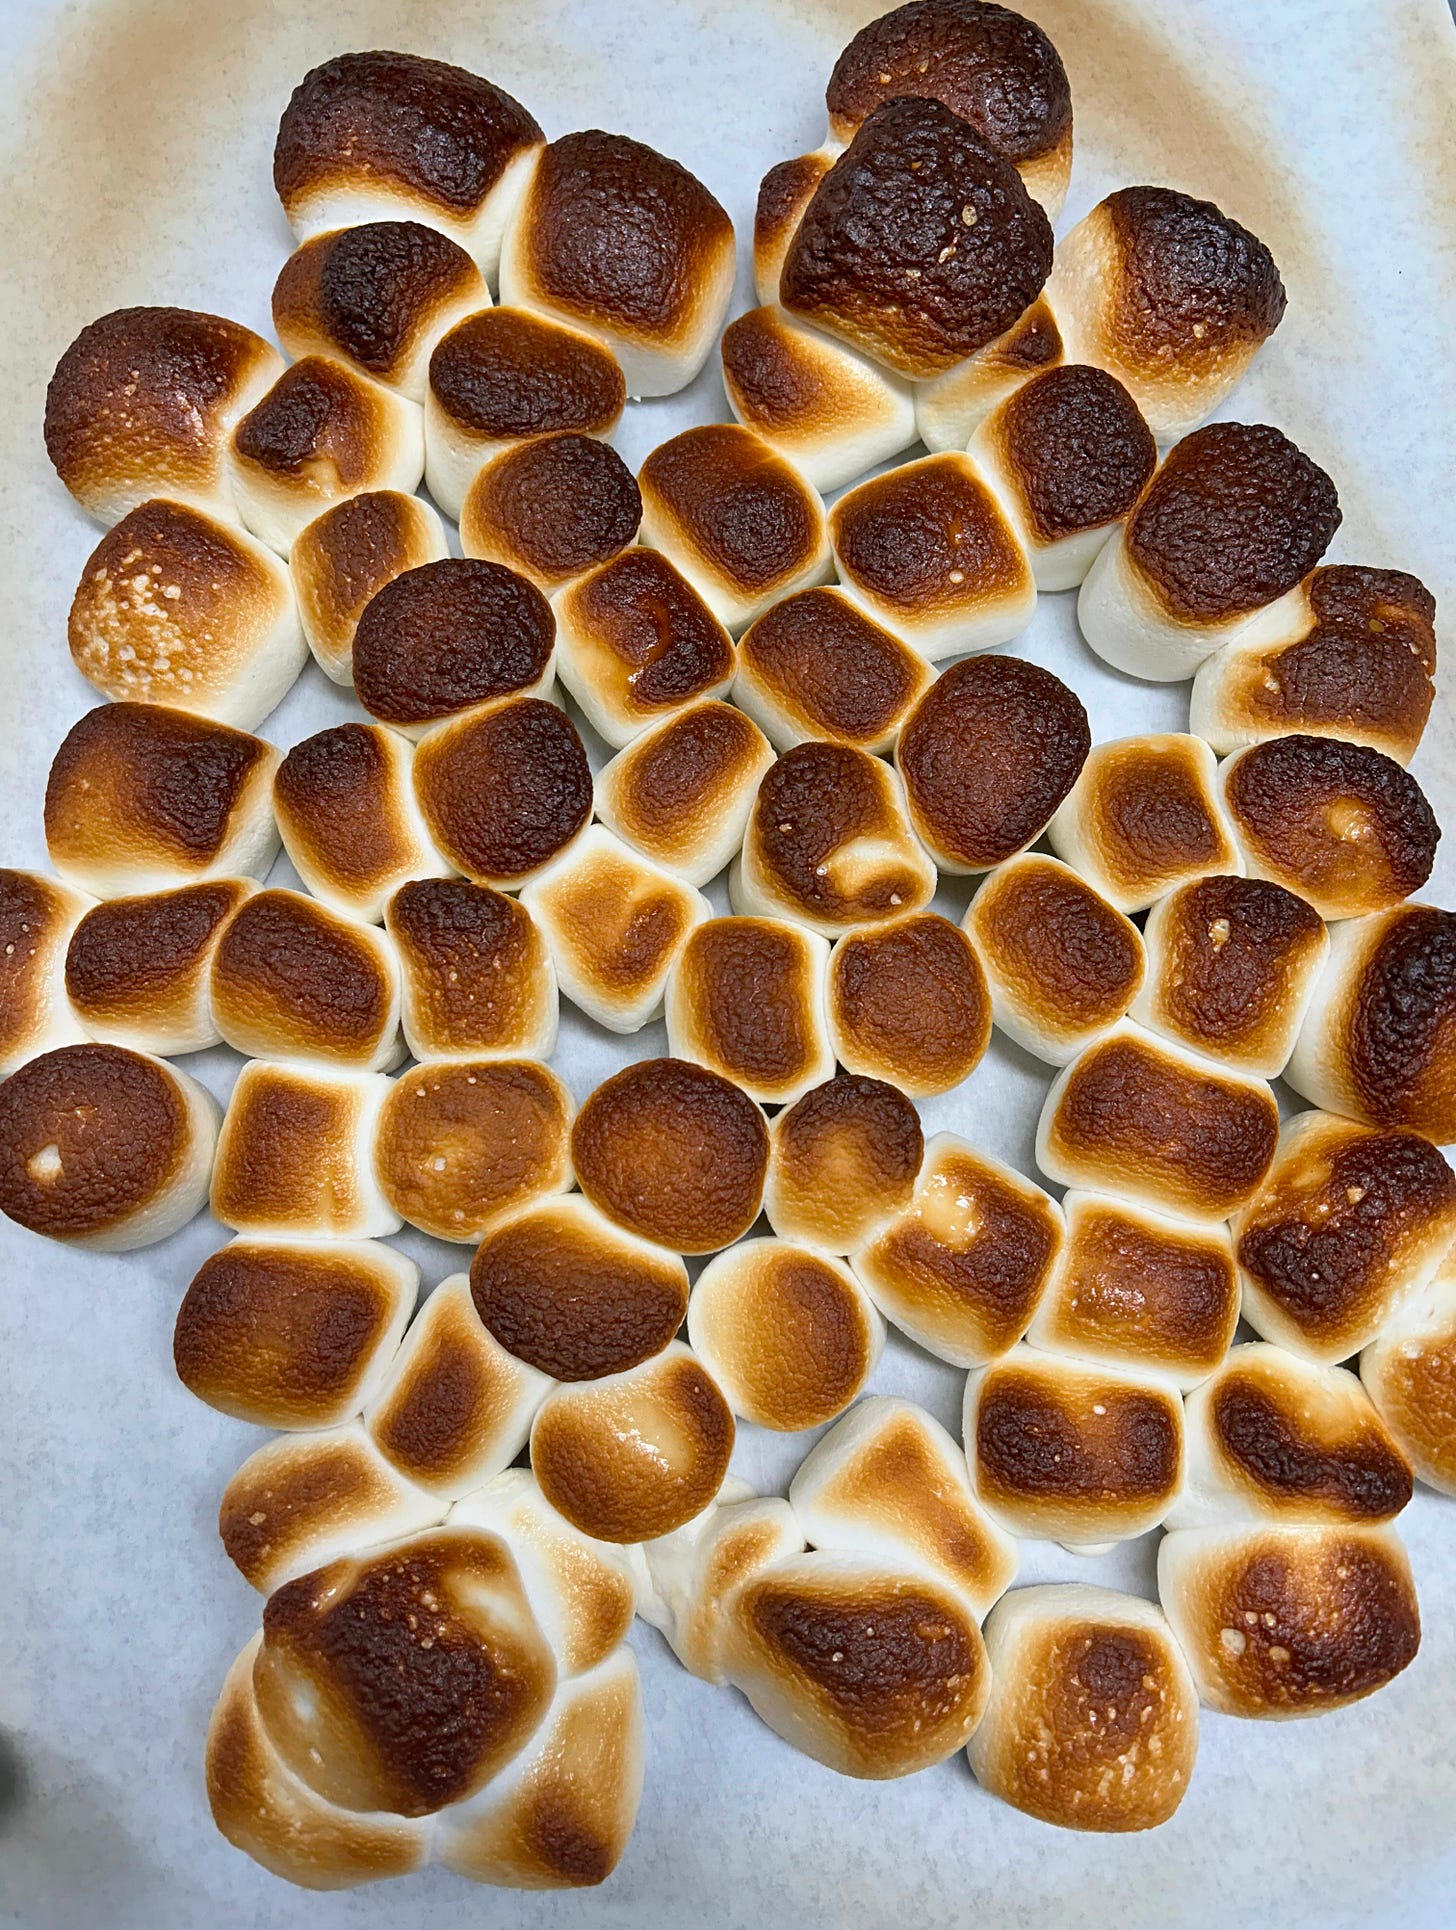
Place your pan in the oven for 1 minute. The roasting will happen quickly, so be sure to watch it. The marshmallows should be puffy and a deep brown on top. If they aren’t fully toasted yet, keep them in the oven and check on them every 20ish seconds.Put it all together
This next part can be a bit finicky, but it’s going to be okay. We have to act with a bit of haste so that our marshmallows don’t dry out.
Once the marshmallows are browned, remove them from the oven. Using a rubber spatula in one hand and an oven mitt to hold the pan, scrape the burnt marshmallows into the pot with the butter. The marshmallows will still be gooey enough to to scrape, but inevitably some marshmallow will stick to the parchment paper and not make it into our treats - this is okay.
Place the remaining marshmallows in the pot and stir with a rubber spatula. Add vanilla and salt. The mixture will be pale brown and speckly. If the mixture isn’t coming together, put the pot back on a low heat and continue to stir. It should be thick and glossy.
Pour the cereal into the pot and remove from the heat. Stir with a rubber spatula, being sure to fold the mixture over itself and scrape the bottom of the pot to fully incorporate the marshmallow.Set the rice krispie treats
Pour the sticky mixture into the parchment lined pan. Scatter a handful of mini marshmallows onto the mixture. At this point, I like to use my hands to press it down but because it’s super sticky, it’s helpful to spray a little bit of nonstick cooking spray onto your hands. You just need a little bit. If you don’t want to use your bare hands, use a piece of parchment paper.
Incorporating the mini marshmallows, press the mixture to the edges of the tray. Be careful not to press down too hard, you don’t want to press all the air out, you’re just gently guiding it. This is how we ensure a light and chewy treat versus a flat and condensed one.Cool and eat, or store
Place another sheet of parchment paper on top of the rice krispie treats so that they don’t dry out as they cool. They’ll be ready to eat in about 15 minutes (or eat them while they’re warm and gooey). Cut them into whatever shape and size you please.
To store, wrap them in plastic wrap or store in an airtight container. They do not need to be refrigerated and will stay fresh and chewy for 1 week.


